Wednesday, February 18, 2015

Daleks for Digital Citizenship: Five Tools for Attributing Creative Commons Images

There are several tools available for quickly and correctly attributing Creative Commons licensed images. I've previously shared screencasts for using two of them, but I've recently discovered others.

Photopin Example:
One of my latest discoveries is Photopin.com.

Like ImageCodr.org and the Flickr CC Attribution Helper, which are tools that may be dragged to one's toolbar, this site allows users to grab HTML code that will quickly generate an attribution on a website or blog.

Unlike ImageCodr.org, this tool requires users to download a desired image and copy the HTML code in two separate steps.  Currently, it's not possible to preview the attribution prior to pasting the code.

One thing to watch out for with Photopin.com is that the sponsored images on their site may have watermarks on them.

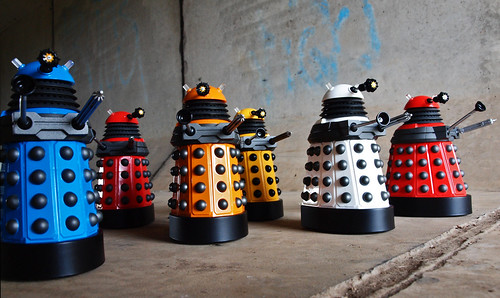
photo credit: Exterminate via photopin (license)


Photos for Class Example:
I learned about this tool from Richard Byrne, who recently wrote a blog about the Photos for Class widget that allows users to add a tool to their blog to search for Creative Commons licensed images.

Images from this site have been filtered and deemed safe for a school audience and have the attributions typed on the actual images that are downloaded for personal use.

While this tool eliminates some of the guesswork, the attribution may be difficult to read (see the example on the left) if the image selected isn't large.  This tool should be used judiciously, because text that's impossible to read defeats the purpose of attribution.  (I've linked the image to its original source.)


FlickrCC Stampr Example:
The FlickrCC Stampr was created specifically with students in mind and for use on mobile devices.

Like Photos for Class, this tool can stamp attribution information directly to an image for download.  Like ImageCodr, you can choose the image size you want and opt to copy the HTML code.

This tool is particularly useful for creating remixes and other derivative works, because it only filters images licensed with those permissions!


ImageCodr Example:
nine daleks by Johnson Cameraface, on Flickr
I prefer the ease and appearance of ImageCodr attributions.  The name of the license and the creator of the image are both prominent in this attribution, and it's all accomplished in one step.

Additionally, users can preview the attribution when selecting the size of their image.  This is handy in the event that you want to copy and paste the attribution into a Google Doc or a static presentation, rather than using HTML code to generate it for you.


Creative Commons Creative Commons Attribution-Noncommercial-Share Alike 2.0 Generic License by  Johnson Cameraface 


Flickr CC Attribution Helper Examples:
Flickr CC Attribution Helper allows you to "build your own attribution tool," enabling you to choose whether you want to download an image and copy the attribution together or separately or to use the HTML code. In the first example on the left, I added the attribution info separately from the image.  As a result, the attribution is not hyper-linked.


Creative Commons licensed (BY-NC-SA) Flickr photo by Johnson Cameraface: http://flickr.com/photos/54459164@N00/5669445634


Using the HTML code, rather than copying and pasting the image and attribution separately, will result in the creation of a hyper-linked attribution, which is useful for interactive images on websites or blogs.


creative commons licensed ( BY-NC-SA ) flickr photo shared by Johnson Cameraface


Having the attribution information stamped directly on the photo is another useful feature of this tool. The attribution will not be hyper-linked if you stamp the image.

Tuesday, February 17, 2015

FLOG: Deleting Can Be Dangerous

Wow, have I failed fabulously!

A few days ago, I got a wild hair and decided to tidy up my photographs.  I'd gotten an alert that some new images from my iPhone had been automatically uploaded to Google+, along with an option to share them.  For some reason, rather than ignoring the message like I usually do, I was prompted to look through all of the photos and start deleting images that I didn't think that I'd be needing again.  I had duplicates of several images, and I thought others were no longer needed because they were already posted to my blog.

What I didn't realize was that deleting the images from this stream had the result of automatically removing them from all of my blog posts!  Conceptually, I missed the boat on where the images actually live when they are uploaded to Blogger.

Since I'd been so thorough that day, I emptied my trash before discovering my error.  The images that had been saved to my Drive were safe, but the ones that I'd downloaded to my Chromebook and then uploaded to my blog (without saving to Drive) all disappeared.

After spending the morning trying to reconstruct and replace the missing images, I can safely say that I have learned something new about what NOT to do.  I have also learned that it might be a good idea to create a folder in my Google Drive for all of my Blogger images.


Friday, February 13, 2015

Playing With LilyPad MP3

Today, I learned how to upload music that I made on Garage Band onto a micro SD card to play on a LilyPad MP3 player.  So far, I've only experimented with the Trigger program that comes with the MP3 player.  Using this program, I can trigger up to five songs.

Now that I've soldered the encoder to the center (so far this has been the trickiest part), I can add more tunes and adjust the volume once I upload new code.  This will be useful, because the small speakers I have hooked up don't sound particularly good at the default volume.

I'm not yet sure that I want to do with this gadget now that I've had a chance to play with it.  I am kicking around a few ideas, but nothing has fully captured my imagination.

I've seen people use these in holiday sweaters, musical aprons, and interactive art projects. Somehow, none of these ideas are inspiring me right now.  To be honest, I wish that I'd spent a bit more time thinking about what I might use this for BEFORE I started playing with it.

Since a fresh idea isn't coming my way as quickly as I was hoping, I'm going to put this on the back burner and let the ideas incubate a bit.

Tuesday, February 3, 2015

Reflections on Girls Make IT

Seven schools, 21 participants, and two high school volunteers attended our Girls Make IT event on 30 January 2015! Although we ran out of time to get to the coding (we had an ambitious agenda), the creativity and perseverance of this crew was an inspiration!

Here's What Worked and Some Ideas for Next Time:
1.  The icebreaker was fun, but it went over the time we'd allotted for it.  I'm glad we didn't interrupt the creative process, though, because it was valuable for getting people talking, sharing, and problem-solving.

2.  Each person got a packet of instructions, so individuals and groups could work at their own pace and help one another.  A couple of my instruction sheets may need a few small tweaks.  Next time, we should consider adding links for "How to videos" to each hand-out.

3.  Tag-teaming with Leah was fun and essential!  Having another instructor circulate and assist groups might be helpful in the future (unless we reduce the group size).

4.  Each team got a bag of supplies.  Next time, we should put names of schools on the bags (and include an inventory checklist).

5.  The progression of skills used in the projects made sense conceptually, but we ran out of time for the coding.  The only way to get around this would be to reduce the total number of projects in future workshops or plan to do the coding in a subsequent workshop.

6.  Creating a word wall (or handout) with key terms such as circuit, short circuit, polarity would be useful.

7.  Having a high school mentor speak about her experiences at EHS and teach the girls how to solder worked incredibly well.  Thanks, Max!

8.  Ensure time for a proper wrap-up and more sharing.

9.  Post the wifi code (and add it to the girls' packets).

10.  The use of Google Classroom was a good way to give our girls digital copies of the projects.  Adding video instructions here would make sense.

11.  Sending out certificates was a nice touch.  Thanks, Lucie!