Thursday, December 8, 2016

Artwork Brought to Life with Photon Sensor Data (#IoT)


Art Brought to Life with Photon Sensor Data


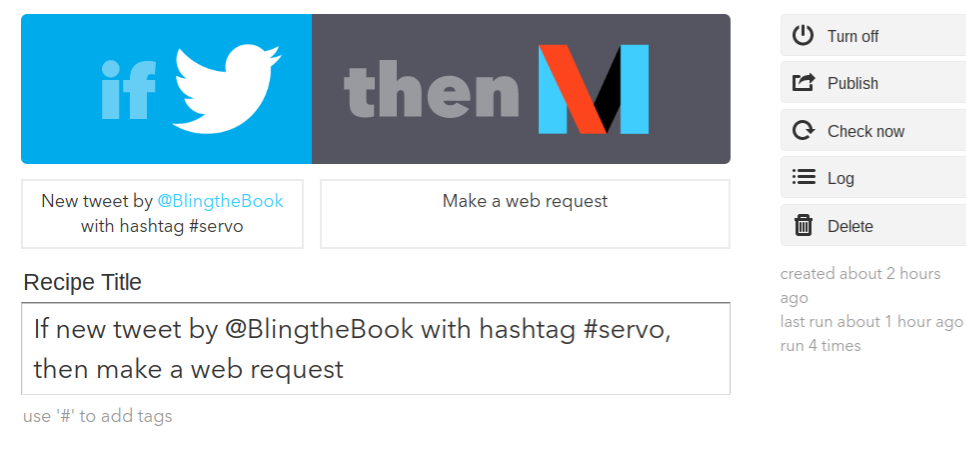
I'm making progress toward my goal of creating a wifi-connected book that uses data to help tell a story.  As a test of concept, I created a Thing HTTP app and a "React" app in ThingSpeak to trigger a Particle function (on one Photon) based upon readings from a Photocell (attached to a second Photon).  To get started, I created a ThingSpeak channel and a Particle web hook by following this tutorial.

Once I created the web hook and connected my Photon to a light sensor, the Photon started logging the data on ThingSpeak.  In order to make the data more useful, I modified the Photon code in the tutorial by adding the following lines to the loop, just above the line containing the Write API key for the ThingSpeak Channel.)

value = map(value, 0, 4096, 0, 255); //maps values
value = constrain(value, 0, 255); //constrains values between 0 and 255.  


Next, I uploaded this code to a second Photon, connecting the Photon to a paper circuit using alligator clips. Lastly, I created the ThingHTTP and React apps.


The React app allowed me to set up a trigger related to the data.  I set it up so that a reaction happens any time the sensor picks up a value of 150 or greater (when it's cloudy or dark and the resistance increases) or 50 and under (when it's bright or sunny) . The ThingHTTP app allowed me to post an HTTP request to Particle, triggering the Particle function that illuminates the owl's eyes and the candle flame.


I later added LEDs to simulate falling snow.


Monday, November 14, 2016

A Working Prototype (#IoT)

Merging Different Functions

I've reached the point in my exploration where I've got several different functions merged into one program and a working prototype that uses alligator clips, a servo, a buzzer, NeoPixels, and surface mounted LEDs. The trick is going to be figuring out how to streamline the circuit so that it can fit neatly inside of a book (that will be built to accommodate it), with different functions playing on different pages to help tell a story of some sort.  

I just ordered some conductive fabric strips to test out for the hinges.  This tape is conductive on both sides, so I could conceivably use it on the hinges and adhere it to copper tape soldered to the Photon.

I have been unsuccessful getting a more compact servo to work with the code, so I may have to table the servo idea, unless I can come up with a way to conceal it.  The servo I'm currently using, the TowerPro SG90, is over an inch tall.  The one I want to use, the HK5320, is much smaller.  I can't figure out if the issue I'm having relates to voltage or something else.

SMD LED Function

Monday, November 7, 2016

Interactive NeoPixels with Photon and Twitter (#IoT)

Today, I spent time experimenting with code and playing around with  If Then Than That (IFTTT), which recently changed its set-up.  My goal was to start merging programs on my Photon.  So far, I've got a servo and NeoPixels running in one program, but I'd still like to add in code for a buzzer and LEDs that will be triggered by a light sensor.

My most exciting breakthrough was figuring out how to use IFTTT's "New Tweet From Search" feature, which makes it possible to trigger a web request by filtering a search in Twitter.  In the case of my experiment, I created Applets, formerly referred to by IFTTT to as recipes, that can control the colors of NeoPixels connected to my Photon, in much the same way that CheerLights work!


This could provide an interesting way to interact with a wifi-connected book.  A reader could send a tweet to change the color of LEDs in the book or scan a QR code to achieve the same effect, by triggering a Maker Event (also set up in IFTTT).  While I'd already figured out how to do this with my own Tweets, I now know how to allow other peoples' tweets to interact with my Photon.  My next step is to add code to the program so that a musical function is called in response to data received on a light sensor.


Friday, October 28, 2016

Photocell Data in ThingSpeak Can Trigger a Servo on Photon (#IoT)


In the process of learning about how the Internet of Things works, as I attempt to create a wifi-connected book, I wanted to figure out how to get sensor data from a ThingSpeak channel to trigger a Particle function, even if the data I'm using isn't super juicy.

In an earlier post, I set up my own private ThingSpeak channel and connected it to the Particle API via a web hook.  Since then, I've updated my code so that it maps the value of the analog data, constricting the readings within a range of 0-255 instead of 0-4095.
While playing around with ThingSpeak this time, I used the React and ThingHTTP apps to use the data from the photocell to trigger a servo connected to a Photon. The React app allowed me to set up a trigger related to the data.  I set it up so that a reaction would happen any time the sensor picked up a value of 30 or under (or when it was sunny and the resistance dipped).  Then, the ThingHTTP app allowed me to post an HTTP request to Particle, in much the same way you would if using the Maker Channel on If Then Than That (IFTTT).

This breakthrough is exciting, because I have figured out how to control a physical object using my own data.  Now, if I wanted to, I could use the data from a photocell to trigger a piezo tune, a servo, or an LED light show, based upon whether it's sunny or dark outside.  I'm not yet sure how I'll use this new knowledge, but it's mine nonetheless!

Tuesday, October 25, 2016

Triggering a Rickroll on a Photon with a QR Code (#IoT)


Over the past couple of days, there has been a lot of news circulating about security issues present in gadgets connected to the Internet of Things.  Keeping that in mind, I'm cautiously continuing my experimentation with the Photon, trying to be mindful of the fact that there are privacy risks involved in transforming ordinary objects into smart objects.

Thinking about ways that music might contribute to the creation of an interactive book that I'm going to be creating, I started tinkering with the code from Spark Fun's Music Time tutorial that plays Rick Astley's song "Never Going to Give You Up."  I tweaked the code by creating a new Particle function that only plays the music when the function is triggered by a web call.  I used the Maker Channel on If Then Than That to trigger it and linked it to a QR code (see previous post).

Even though electronic buzzer music can be a little annoying, I'm thinking that it would be interesting if QR codes embedded into a book could trigger different tunes or sound effects to help advance a narrative. 

Friday, October 21, 2016

Triggering a Photon Servo with a QR Code (#IoT)


In my last post, I got a servo running on a Photon by using web requests sent from Node.js and Twitter. After getting to that point, I wondered how I might automate the process so that someone else could trigger my servo, if I were to integrate one into a wifi-connected book.  Today, I had an idea that this might be achieved by creating a QR code.  I wasn't sure whether this was possible until I came across a blog by Trevor Fox. While his post was related to a completely different (albeit clever) use of the QR code, I noticed that he was using If Then Than That (IFTTT) like I was, when I created my web request for Twitter.  This prompted me to do some experimenting which ended up working!

The last time I played with my servo, I created a recipe that paired Twitter with an "Action" on the Maker Channel.  The "Action" was a web POST.  When paired with the hashtag #servo, it triggered a Particle function that made the servo move.  This time, I needed to create a "Trigger" to receive a web request.
The "Trigger" became a unique URL that I could then paste into a QR code generator to produce a QR code.   


After making a new recipe on IFTTT that used the "Trigger" to call the "Action," I was able to control the servo by scanning the QR code.


To learn more, visit "How to Trigger Events" on the Maker Channel page.   

WARNING:  Using a QR could become a security issue, if someone really wanted to try to figure out your IFTTT key. 

Monday, October 17, 2016

Controlling a Servo with Photon (#IoT) #progress


I'm continuing my exploration of the Photon today and am happy to report a couple new things that I've learned.  My initial goal was to get a servo up and running and to control it via Twitter.

Thanks to some open source code from MIT, shared on the Spark Fun website, I was able to get my servo to run at an established time and date, which is pretty cool!  The code that I'm using was designed to have a servo tip fish food into a tank at a certain point in time, but an additional Particle function in the code also allows the servo to be moved via a web request.
Wiskers is the name of my device.  Feed is the name of the Particle function.
Although I was able to quickly get the servo to work by calling the function in the command line that I set up using Node.js, creating the web request was a little trickier.  In order to call the function on If Then Then That (IFTTT), I had to provide the device ID and authentication code for my Photon, as well as a unique URL linking to Particle.  This took a while to figure out, but it's working now.  I just have to remember to refresh my recipe in ITFFF whenever I change the code in the Particle app.
In any case, I am trying to imagine how I might embed a tiny servo into a book to help advance a narrative. It would have to be smaller than the one I'm using now.  Off the top of my head, I can imagine a servo powering a tiny propeller in a steampunk book.  Now, I need to figure out a way to allow the servo to be triggered by someone other than me.  I'm not yet sure how to automate that, but I'll keep taking baby steps until I figure it out.

Wednesday, October 5, 2016

My Photon is Sending Data to ThingSpeak! #IoT

I've been continuing to play around with my Photon, as well as trying to better understand how posts, calls, and web hooks work. After spending a couple of weeks studying and experimenting with other people's code, I've learned how to create and call my own Particle functions! This means that I'm now able to control the colors of neopixels on my Photon in a variety of ways, using HTTP web requests. This is similar to the way CheerLights works (see related blog), only my posts are limited to controlling LEDs (or a buzzer) on my device.  I can do this by typing my post information into the RESTED add-on for Firefox; I can do it through Twitter, by creating a recipe on If This Then That (IFTTT); I also figured out how to use curl (in the command line of my PC) , allowing me to test the HTML code that gets routed to my Photon.  Getting to this point has not been at all intuitive, so I'm pretty excited I've gotten this far!

Once I figured out how to use posts to control the behavior of LEDs (outputs), it occurred to me that I still didn't know how to use a Photon to read the value of sensor data (inputs). After many failed experiments, blindly attempting to alternate between digital and analog pins to figure out how they worked, I bought an ebook titled Programming the Photon: Getting Started with the Internet of Things and started reading it. In the process, I figured out why a web hook I’d created (linking my Photon to a channel on ThingSpeak) was returning nonsense data. That data was “float” data, which is generated when a microcontroller’s analog pin (in this case A0) isn’t actually attached to a sensor.  The book gave me the idea to connect a photocell and resistor to my Photon.  In the process, I discovered that the web hook actually did work, and I was actually able to get data from my device to populate a chart on a Thing Speak channel I created for this purpose! 


My next step is to figure out how to make this data more meaningful, and how I might use it (or some other type of data from my device) to talk with a wearable or book that I make.  I also need to figure out how to use some of the other features of Thing Speak, because I don't yet understand how to use MATLAB code or apply most of the Thing Speak apps.


Thursday, September 15, 2016

Internet of Things (IoT) Here I Come!

Taking inspiration from Jie Qi and Natalie Freed, I am embarking upon a quest to create a wifi connected book of my own.  While I'm only at the start of my inquiry, I've already got a few ideas swirling.

Photon Unboxing
After reading details about Natalie Freed's Tide Notebook at NEXMAP, I discovered that she used the SparkCore microcontroller to connect her book to the web.  In particular, she accessed tide data and used it to control LEDs mounted inside.  The newest iteration of SparkCore, the Particle Photon microcontroller, can also send or receive data through Particle Build.  Paired with a free open-source Internet of Things (IoT) platform called ThingSpeak, anyone can access or share data and use it to control physical objects, such as the LEDs in a book, wearable, or other type of physical object...even without an MIT degree!

Hello World!

My Remembrall
One enticing project that uses a Photon, in combination with several cloud-based apps, is the Internet Connected Remembrall, a physical orb that glows red when its owner neglects something on their to-do list.


By following the directions and really thinking about what each app was communicating with the other, I began to slowly understand how the Internet of Things (IoT) works on a small scale.

Once I got my own Photon connected to the Internet, I was able to start taking the code apart and changing it.  I literally squealed when my LED, connected to a hashtag on Twitter, turned on for the first time!

I've started learning a bit about the role of Web Hooks and JSON (Java Script Object Notation), both of which are aspects of connecting physical objects with data. Thanks to the excellent documentation in the Remembrall Instructable, I now have a road map for making my first wifi connected object tied to the data I choose.

Another thing that I've been playing with is creating an object connected via Particle Build to ThingSpeak's CheerLights channel.  In case you haven't heard of CheerLights yet (I just did), data, generated through people's tweets around the world, can be harnessed to control the color of LEDs in your own physical objects.  For example, if I send a tweet to @CheerLights and request a specific color, a Web Hook triggered by the Twitter feed will signal a change in the LED color on all of the objects connected to the data feed, including my own.


If I connect my own object to the data (in this case, a Photon with a Spark Fun Wearable Shield attached to a neopixel), I can see the light color change in near real time!


Tuesday, August 23, 2016

Etextile Bracelets = Fun with Felting

I recently started experimenting with needle and wet felting after a generous friend gave me some of her beloved wool stash!


While I've been dabbling with etextiles for about three years, my interest in wool as a medium was piqued by Barbara Liedahl's Ultimate Felt Bracelet with LEDs Instructable (CC BY NC).  A fresh take on an old idea, Liedahl's detailed tutorial inspired me to set aside the craft store felt to make something unique.

My first pieces of felt were fun to make, even if they were a tad on the bulky side.  


Needle felting propelled me into a meditative state almost immediately!


While I was happy that I'd used slow flashing 5mm RGB LEDs to add visual interest, I thought my sewing along the edges looked a bit sloppy.


In the second iteration, I added a snap switch and substituted machine stitching along the edges.  

Circuit details of the snap switch are depicted below, although I used different LEDs for this project.


Thank you, Barbara Liedahl!  

Here are a few more bracelets I've made for friends, including one that incorporates an Attiny85 (bottom).


Monday, August 15, 2016

MIDI to Arduino: Easily Add Music to Your Wearable Electronics!

I just discovered a magical tool that can convert a MIDI file directly into Arduino code that may be uploaded to a wearable microcontroller such as a Lilypad!  It's called Green Light Go -- Midi to Arduino Source Code Generator.


Using this tool is a MUCH easier way to code music than trying to use sheet music and a frequency chart to cobble a song together.  (Ask me how I know.)

To get started, your computer needs some type of MIDI sequencing/notation software, such as Rosegarden, which is open source.  From there, you'll be able to upload MIDI files and modify the names of individual tracks to correspond with the pins on your microcontroller.  This demo video explains exactly how it works.

Here's a video of my Lilypad playing the Simon and Garfunkel song The Sound of Silence through a buzzer on pin 7.

  • I started by finding a MIDI file I wanted to use on this site.
  • Next, I uploaded The Sound Of Silence [4] (MIDI sequencing by Mick O'Neill) into Rosegarden.
  • After changing the names of the tracks, I exported the file as a new MIDI file, which I then uploaded into Green Light Go.  
  • Once the code was generated, I pasted it into an Arduino sketch on Codebender and uploaded it to my Lilypad.  You can find the code for it here.
In the process of tinkering, I learned that MIDI files with a short simple tracks work much better than sophisticated files with lengthy tracks.


Sunday, June 26, 2016

Flora Sparkle Skirt #etextile

After learning how to make digital clothing for my avatar in Jokaydia Grid (for a graduate class), I decided to return to the real world to try my hand at sewing a real skirt.


Taking inspiration from a variety of YouTube videos (most notably this one), I purchased 20 yards of black tulle (I only used six) and two yards of blue satin (I only needed one) to sew my first garment ever!

My first skirt...sans electronics.

While it turned out pretty well (albeit a little on the large side), it wasn't complete without some bling!  So, I followed Becky Stern's directions for creating a Sparkle Skirt, using a Flora, motion sensor, and 12 neopixels!

Strand test mode


I'm sure there is a better way to do this.

Throughout this process, I learned quite a bit.  In addition to figuring out how to make gathers in fabric using the cording foot on my sewing machine, I discovered the beauty of fabric paint as an electrical insulator, which I'd never thought about prior to this experiment.


Since my skirt has so many gathers, it was prone to short-circuiting before I applied a shiny, navy fabric paint to the exposed conductive thread.   This was the most tedious part of the process, since my circuit went all the way around a rather lengthy diameter. But, it worked like a charm!

On the underside of the skirt, I used iron-on fusible webbing to insulate the data line of the circuit, since it was hand-sewn.


Sunday, June 19, 2016

Bryan Cera's Paper Synth

After finding a link to Bryan Cera's Paper Electronics Workshop on the Google + 21st Century Notebooking community page, I ordered a few supplies and got started making my own paper synthesizer!

Bryan Cera's Paper Synth


I made a few mistakes along the way, but I learned how to use my multimeter in continuity mode and how to manually designate a sketchbook location in the Arduino IDE under preferences, neither of which I've ever had to do before.

Bryan's instructions are very detailed, and he generously shares his templates, code, and supply list.  So, if you are interested in using an ATtiny85 to create your own musical instrument, be sure to check out Bryan Cera's Paper Electronics Workshop!


Friday, May 6, 2016

Channeling the 80's: Sound Reactive Flora Skirt


After putting the finishing touches on this sound reactive leather skirt (made for my daughter, who may never actually wear it in public), I found myself thinking back to my high school years, hanging out in the discos of Germany! While I wouldn't dare go out in public wearing something like this today, I am amused to no end, imagining how quickly I would have jumped into this skirt back in the 80's!  Forgive this shameless indulgence.


If you want to make your own sound reactive wearable, or see the process I followed to make this, check out the Sound Reactive Equalizer Skirt on Instructables.

Leather skirt with Flora microcontrollerSound reactive skirt turned offSound reactive skirt Sound reactive skirt turned on


Wednesday, May 4, 2016

A Few Words on Words

photo of Jill and Doug
Photo Courtesy of RETN: 29 Jan 2016
Last night, while reading Bird by Bird, by Anne Lamott, I was struck by something she said about writing being a "desperate endeavor," driven by our deepest needs "to be visible, to be heard...to make sense of our lives, to wake up and grow and belong," to better understand ourselves and connect with others.

In pondering this raw truth, it occurred to me that while I routinely document things I've discovered while playing with tech tools, I don't spend nearly enough time writing about the meat that matters.

One of the triggers that got me thinking about this, was a blog post written by Bonnie Birdsall, referencing the impact of work that I was lucky to have done alongside Doug Dunbebin prior to his untimely passing. Drawing attention to the fact that Doug's legacy lives on through media creation, partly as a result of our collaboration, made me reflect upon the importance of human connection and the intricate web of our interactions and relationships.

I met Doug in July of 2014, while taking Jay Hoffman's powerful course “From Idea to Impact: Harnessing the Power of Video in Your Classroom."  That experience, coupled with my first foray into the Create Make Learn Summer Institute, whet my appetite for digital story-telling and eventually led to my exploration of green screen video production.  After showing Doug some projects I'd been working on, he encouraged me to keep creating and agreed to co-present a workshop at Dynamic Landscapes in 2015.  The workshop was so well-received that we continued our collaboration, and I had the benefit of learning a great deal about myself and the power of words.

When I started working with Doug, I was terrified of presenting to an adult audience.  At one point early on, I made a disparaging comment about something I'd shared while presenting to a small group.  Doug addressed this later, in such a kind and powerful way, that it awakened something in me, fundamentally derailing some old patterns of thinking.  I look back on this conversation with gratitude, and consider the importance of words.

The last time I saw Doug was at the RETN/VCAM producer's party in late January, where I was honored with a Lifelong Learner Award.  Because he'd given me a little advanced warning, I was able to express a few heartfelt words of appreciation to Doug that evening.  I didn't really have much time to fully reflect upon the experience, however, because my father passed away a couple weeks later after a battle with Alzheimer's disease.  My father's loss was followed by Doug's passing three weeks later.

It's taken a while to process these events and begin shaping my thoughts into words, but I think that the heart of the matter is this:  the words we tell others and the words we tell ourselves are powerful.  We cannot underestimate the power of our words to inspire and heal others; but, this can only happen if we share them.

Saturday, April 30, 2016

Raspberry Pi Robot

I recently started learning about Raspberry Pi. One thing I'm really excited about is the CamJam EduKit #3 Robotics kit, available through the Pi Hut. In the process of experimenting with this kit, I've started learning basic programming in Python, and I'm starting to understand how the GPIO pins work.  In addition to coming with two motors and some wheels, the kit comes with a line sensor and an ultrasonic sensor to help your robot avoid obstacles. Support worksheets for the kit are pretty easy to follow and encourage experimentation.


Pi Zero Robot


In  one breakthrough, I learned how to talk to my Pi using another computer via Secure Shell (SSH). Now, my Pi doesn't have to be tethered to a monitor, which is useful for building things that move.

While most of the code written for the CamJam EduKit #3 works the same way with a Pi Zero as as a Pi 3, the ultrasonic sensor appears to be an exception.  I don't yet understand why, but I've confirmed this to be the case.


Pi Zero Robot Innards

Thursday, April 28, 2016

Diving Deeper into Raspberry Pi

After a lot of trial and error, my Raspberry Pi 3 and Pi Zero are both up and running on wifi.  The biggest obstacle ended up being that our router was using a WEP key instead of a WAP key. While I don't fully understand how these differ, the router was the root of my difficulty.  I originally attempted to change the pi's configuration with code, but I was unsuccessful.

After changing a setting on the router itself (from WEP to WAP), writing a clean image of Raspian (via NOOBS), followed by running updates (via Ethernet), was enough to work on my Pi3.


I used the following updates:

sudo apt-get update
sudo apt-get upgrade -y
sudo apt-get dist-upgrade -y
sudo rpi-update

Afterwards, I rebooted the Pi, took out the Ethnernet cable, and re-typed my wifi key.

While I wasn't able to directly replicate these results using the Pi Zero on its own, moving the SD card from my Pi3 to the Pi Zero did the trick.

Being new to Raspberry Pi, I'm excited that I've gotten this far.  It's challenging to wade through all of the information available online, because so much of it is outdated or too complex.

At this point, I know enough to be dangerous.

For example, I can use sample code to make a Pimoroni Scroll Phat blink.


Friday, April 22, 2016

E-textile Fun: Sound Reactive Hat

Flora Sound Reactive Hat

I just put the finishing touches on a sound reactive hat that uses a Flora, a tiny microphone, and surface mountable RGB LEDs. This project is an adaptation of Lina Wassong's Sound Reactive Equalizer Skirt, shared on Instructables under a Creative Commons (CC BY NC SA) license. This is a perfect party hat.


Lessons Learned:

1.  I love Adafruit silicone stranded-core wire!
2.  Soldering RBG LEDs is tedious.
3.  A glue gun is a great tool for strengthening solder joints and diffusing light.
4.  Hand held rivet pliers may be harder to work with than standard spot setters.

I used a leather punch and a hand rivet fastener.

The Flora and a microphone are hidden inside the hat.

I went a little crazy with the glue gun!