Tuesday, March 31, 2015

Creating a Fantasy Photo Using Pixlr (and Creative Commons)

Creating a Fantasy Photo with Pixlr and Creative Commons


If you have time, I would appreciate your feedback on the screen cast embedded below.  

Specifically, I'd like to know whether you were able to follow my directions.  

Update:  I've created an accompanying Job Aid.


Wednesday, March 25, 2015

Reflecting Upon Girls Make It 2: Flower Power

On 24 March, 21 participants from seven Vermont schools converged upon the Burlington Generator maker space to usher in the arrival of spring. Lucie deLabruere, Leah Joly, and Jill Dawson orchestrated the day's events, aided by the leadership of Maxine Breuer, a senior from Essex High School, and Eva Joly, a middle school maker.  To learn more, or to check out additional photos from the day, visit
http://www.girlsmakeit.org.
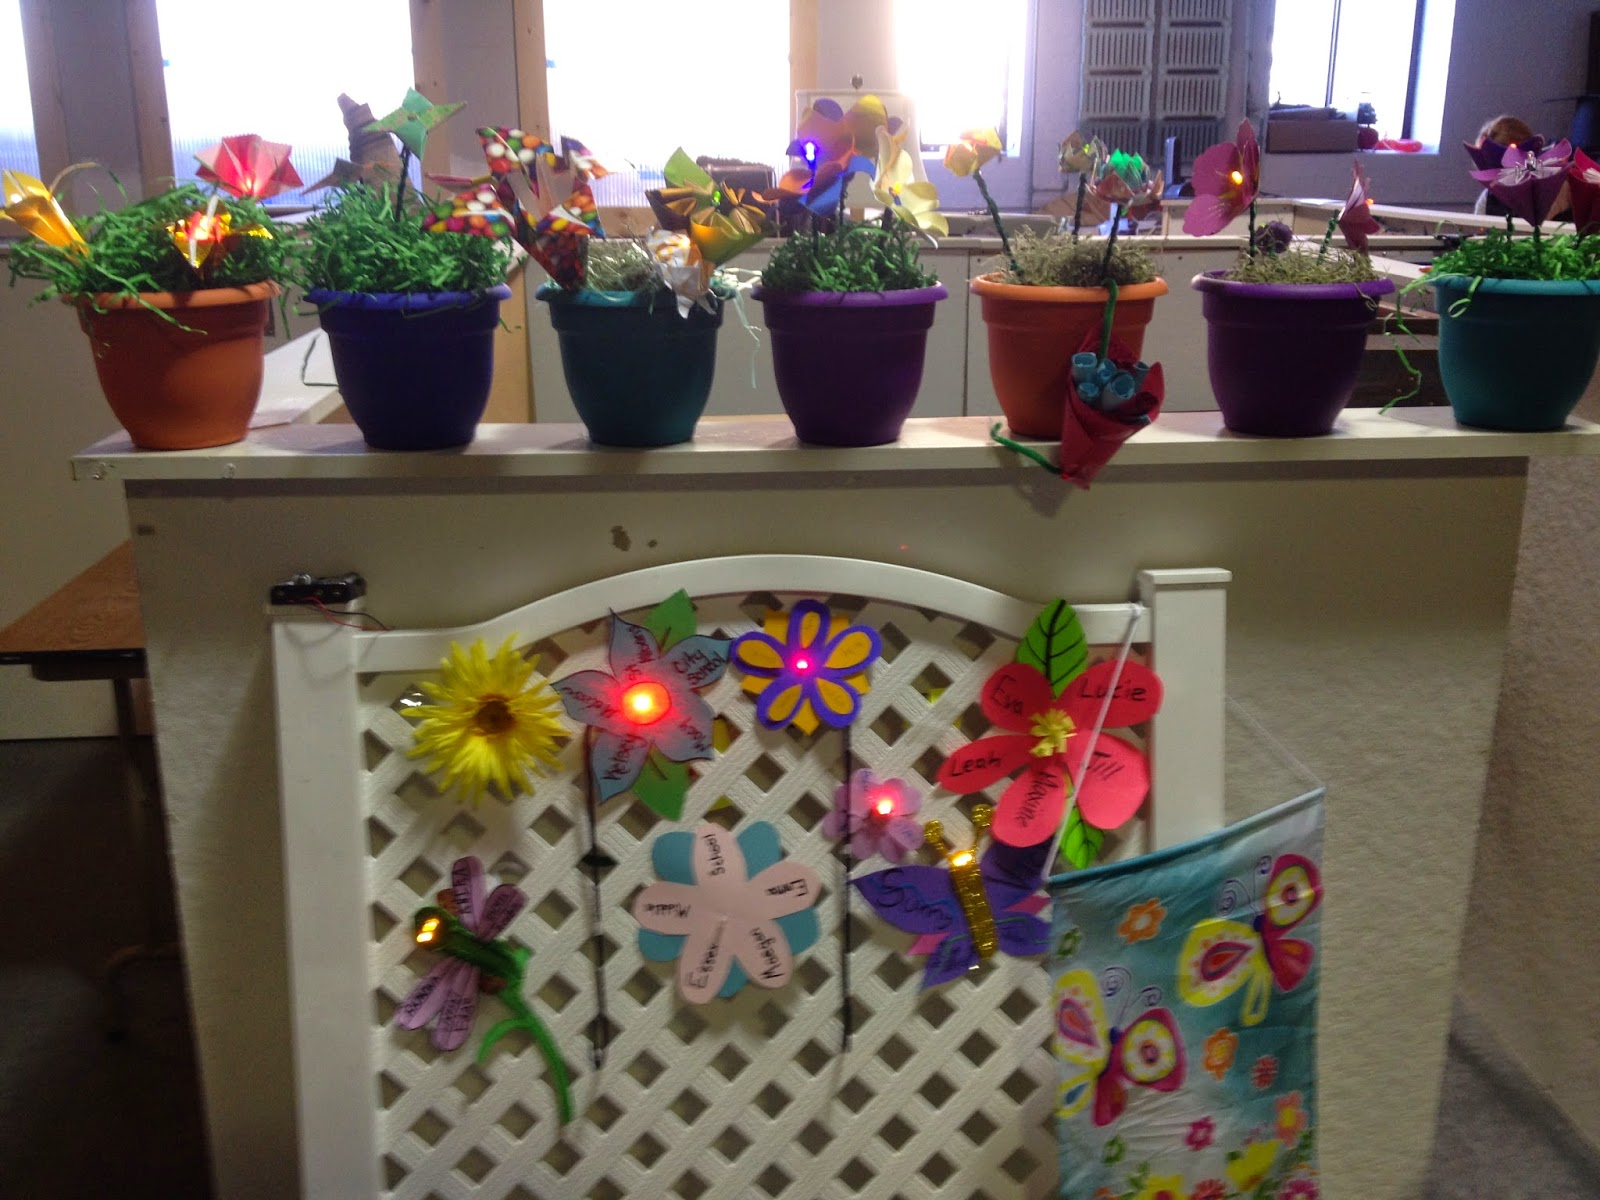
Inspired by MIT's robotic flower garden, Lucie devised a way to introduce girls to coding by turning a frenzy of handmade flowers into artistic arrangements of blinking and fading buds.

Teams met design challenges, wiring up their flowers and connecting them to Lily Pad microprocessors, to control each flower's behavior.  By the end of the day, each team created a portable floral arrangement to take back to their schools and contributed one flower to a community garden, which will be displayed at the Generator's birthday bash later this week.


HERE'S WHAT WORKED:
Like the previous event, having teams work together to solve problems was a good approach.

Because we asked each team to bring two flower tops with them, we were able to spend more time focusing on the coding and circuitry than we would have, had each team constructed all of their flower tops on site.  This approach also resulted in quite a variety of hand-made blossoms.

Participants brought their own lunches this time, which kept costs down.

Prominently posting the wifi code and email address to the Girl's Make It blog encouraged teams to share their progress and achievements with the community.

Having two student mentors helping out was fantastic!

Teams were very invested in making their take-away projects beautiful (and blingy).

We were flexible, based upon the energy and interests of our group;  our pacing felt more natural than it might have, had we tried to pack more into the day.

WHAT MAY BE IMPROVED UPON:

As could be expected, it took some time to get every computer up and running with Arduino.  We also encountered issues with a faulty cord that caused the LEDs in one arrangement to burn out.

We had planned to review circuits prior to having the teams wire up their flowers, but we ended up having them jump right in.  As a result, some flowers took longer to function properly.  Doing the review first, to explicitly tap into the girls' prior knowledge, would have been a good thing to have done.

Having a set of wire strippers would have been helpful.  The scissors worked, but wire strippers would have given the girls experience using a tool meant for that specific purpose.

We didn't anticipate that we'd have a shortage of alligator clips.


Monday, March 23, 2015

My First Instructable: How to Make a Light-Up Book with LEDs and a Switch

My First Instructable


This is my first Instructable, titled How to Make a Light-Up Book with LEDs and a Switch, a lesson that combines circuitry and notebook hacking/ bookbinding!


The process of creating this was straight-forward and fun. I was even able to upload a YouTube video that I created, to explain how switches work.

I love the idea of having students create their own Instructables, because it places emphasis on creation over consumption.

Monday, March 16, 2015

Creative Commons and Captivate

 http://www.fastswf.com/xXdR8Us

Creative Commons and Captivate

For the past two weeks, I've been learning how use Adobe Captivate to create interactive e-learning for my Instructional Design class.  It has been a steep learning curve, but I can see a great deal of potential for this tool for flipped or blended instruction. For example, there is a way to design instruction that adapts to a variety of devices, so that it looks good on every screen.  I haven't tried that yet.

(Updated 25 March 2012)
For my project, I wanted to create an interactive way to teach students and teachers about Creative Commons licenses.  This is the link to the latest draft:  http://www.fastswf.com/xXdR8Us

You may also get there by clicking on the image above. I am interested in hearing feedback about what works and what can be improved.  Please note that this file will only play on a PC, not on a smartphone or tablet.

FLOG (Failure Log):
I really like what this software can do, but I had a heck of a time publishing the latest revisions to Fastswf.com.  After reaching out to a colleague, he suggested that I clear my browser, rename the file, and try again.  I did those things and deleted some extraneous audio.  It finally worked (after 50 previously unsuccessful attempts)!

Wednesday, March 4, 2015

Universal Design for Learning Meets Instructional Design


Universal Design for Learning Meets Instructional Design


I created this animation to explore ways that Universal Design for Learning (UDL) informs the Instructional Design process.

While the video is not perfect, largely as a result of the fact that the characters don't do anything but talk, I learned a lot through researching UDL and was able to apply it immediately.  One thing I learned was the importance of using headings, something that I have not been diligent about including in my blogs, docs, or sites.  I didn't know that aside from looking good, headings serve the additional function of aiding screen readers with navigation.

Before constructing the animation (made easy with Go Animate for Schools), I spent a couple of days researching and writing a script.  I then uploaded it directly to YouTube as a plain text document, allowing YouTube to automatically set the timing on the captions.  This is a different process than the one I tried the last time, and it took less time, because I didn't have to make any edits.

FLOG ALERT:
After producing this video the first time, I thought that I'd try editing it in Camtasia Studio to add supporting visuals to spice it up.  After several hours, I ended up with a hot mess and a headache. Since the original video had "Why Design" written on all of the background shots, efforts to replace that led to a sloppy, spotty presentation that looked like a bad spackling job.  I opted not to use that version, and instead tightened up the dialogue (really) and uploaded another version to You Tube.  It's not perfect, but it's about the process in this case!

Monday, March 2, 2015

#ETT Google Reflection

On Friday, 27 February 2015, I had the opportunity to take a tour of the Google Headquarters in Cambridge, MA as part of a fun-filled day of workshops sponsored by EdTechTeacher.org, in collaboration with Google.  I left feeling inspired, imagining how schools might find ways to carve out the creative space that makes Google such an invigorating and innovative place.


My favorite workshop, Choose Your Adventure YouTube, was taught by Greg Kulowiec, a former Social Studies teacher.  The basic concept of his presentation was that YouTube can be used as a creative and collaborative tool for students to tell a variety of stories, increasing their engagement and buy in, while having an authentic audience.

So far, I've experimented with this idea, using footage of the musical hat that I made for the event, but I didn't leave quite enough wait time on the first clip.  If you are fast, clicking on the link within the video will take you to another video clip.  Doing something like this with students, for an authentic purpose, would be a fun way to bring more video making to the classroom!


Here are some of the biggest aha's that I took away:
  • YouTube Capture is a useful app for capturing footage and quickly uploading it to YouTube.
  • Breaking students up into groups is a good idea.  They can each work on a different component of the video and then add their FINAL video clips to a shared folder in Google Drive.
  • You can give your students a special email address for mobile uploads that allows them to send video footage directly to your desired YouTube Channel, by going into the settings and mobile uploads. You can change this address to control when clips are uploaded to your account by clicking the link under the special email address.  (See the example below.)
  • In the video, itself, you can only link to other videos (or Google+ profiles), not directly to documents. It is, however, a good idea to put a link to sources or additional information within the description of the video.

Switches, GoAnimate, and Creating a Transcript on YouTube

I have recently started playing with the online animation tool Go Animate for Schools to practice creating instruction in the form of dialogue between characters.

I created the video featured here, which discusses how switches work, as a tool that might be added to the Girls Make IT Google Classroom resources.  I like the idea of creating video-based instruction for the site, because it will make it easier for the girls to share their learning with others and to revisit concepts at their leisure.


In the process, I learned something new about YouTube and how it can be used to advance Universal Design for Learning!  Did you know that you can add a transcript to videos in YouTube, allowing your viewers to see the audio written out in text?  Under the settings of YouTube, you can do this by typing in your own Subtitles or Closed Captions.  Or, you can have YouTube translate the script using a voice to text feature.  (When I tried that, however, I had to go in and edit several of the captions.)

To access a transcript, you'd simply need to go to description of the video and click on "More" to find the "Transcript" option.  Alternatively, you could turn the captions on if you wanted to see the text at the bottom of the video.