
Tuesday, May 19, 2015

Saturday, May 16, 2015
Fun With Neopixels!

I've been playing around with paint and a Gemma microcontroller (to learn how to program individually addressable neopixel LEDs).
Gemma would be incredibly valuable for teaching students about eTextiles, because they are less expensive than LilyPad Arduino boards, as well as being smaller, and quite easy to program!
For this purse, I used a Gemma, a LilyPad push button, three sewable snaps, conductive thread, and 2 coin cell batteries (in a holder) to power up nine neopixels.
From start to finish the process took three days. This was largely due to the fact that I had to strip the leather and hand punch all of the holes that I sewed conductive thread through.
Using the Adafruit Neopixel library, and the button cycler code, I was able to customize the colors to match my bag.

Here are some pictures of the purse that I just finished transforming! (In the event that you are wondering about the process or supplies that I used to paint and seal the leather, you may want to check out Sassyfeet.com.) If you'd like to know where I got my inspiration for creating an "electronic handbag" check out: http://www.electronicfashion.co.uk/
 |
| Black leather purse |
 |
| Random Rainbow Pattern I used Lumiere leather paint to make my design! |
 |
| Sewable Snaps Inside Purse Create a Switch |
 |
| Sewable Snaps on Back of Pocket |
 |
| Complete Circuit: Attach Pocket Using Snaps |
 |
| Gemma Sewn to Inside of a Pocket |
Monday, April 6, 2015
Delving into DoInk: Upcoming Workshops
Doug Dunbebin and I are going to be teaching an introductory green screen workshop at RETN on 1 July, 23 September, and 11 November. To learn more, or to register, please visit
http://www.retn.org/GreenScreen101 and select "iPad Workshops and Labs" from the "Upcoming Events" sidebar.

Saturday, April 4, 2015
Job Aid: Creating a Fantasy Photo Using Pixlr Editor
This job aid accompanies a screen cast.
.png)
.png)
A larger version of this job aid may be accessed at: http://goo.gl/JAgsnB
Tuesday, March 31, 2015
Creating a Fantasy Photo Using Pixlr (and Creative Commons)
Creating a Fantasy Photo with Pixlr and Creative Commons
.jpg)
If you have time, I would appreciate your feedback on the screen cast embedded below.
Specifically, I'd like to know whether you were able to follow my directions.
Update: I've created an accompanying Job Aid.
Wednesday, March 25, 2015
Reflecting Upon Girls Make It 2: Flower Power

http://www.girlsmakeit.org.
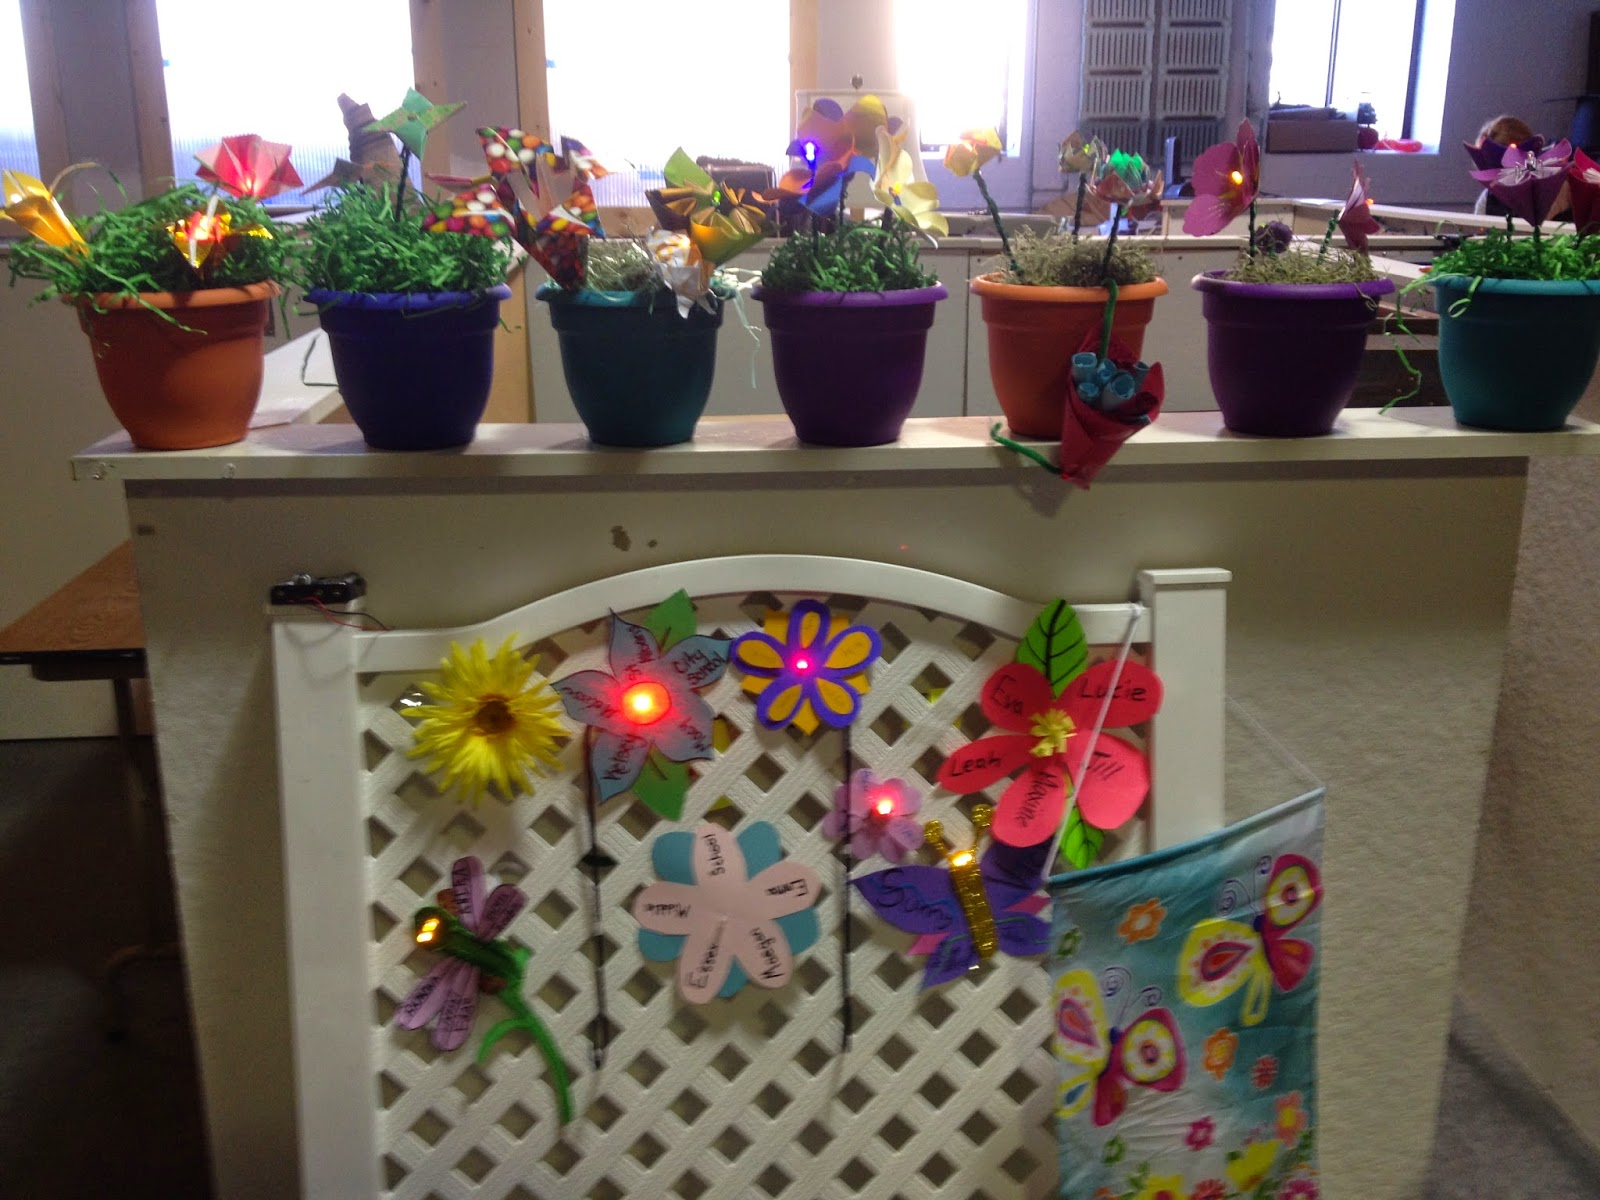 Inspired by MIT's robotic flower garden, Lucie devised a way to introduce girls to coding by turning a frenzy of handmade flowers into artistic arrangements of blinking and fading buds.
 Teams met design challenges, wiring up their flowers and connecting them to Lily Pad microprocessors, to control each flower's behavior. By the end of the day, each team created a portable floral arrangement to take back to their schools and contributed one flower to a community garden, which will be displayed at the Generator's birthday bash later this week.

HERE'S WHAT WORKED:
Like the previous event, having teams work together to solve problems was a good approach.
Because we asked each team to bring two flower tops with them, we were able to spend more time focusing on the coding and circuitry than we would have, had each team constructed all of their flower tops on site. This approach also resulted in quite a variety of hand-made blossoms.
Participants brought their own lunches this time, which kept costs down.
Prominently posting the wifi code and email address to the Girl's Make It blog encouraged teams to share their progress and achievements with the community.
Having two student mentors helping out was fantastic!
Teams were very invested in making their take-away projects beautiful (and blingy).
We were flexible, based upon the energy and interests of our group; our pacing felt more natural than it might have, had we tried to pack more into the day.
 WHAT MAY BE IMPROVED UPON:
As could be expected, it took some time to get every computer up and running with Arduino. We also encountered issues with a faulty cord that caused the LEDs in one arrangement to burn out.
We had planned to review circuits prior to having the teams wire up their flowers, but we ended up having them jump right in. As a result, some flowers took longer to function properly. Doing the review first, to explicitly tap into the girls' prior knowledge, would have been a good thing to have done.

Having a set of wire strippers would have been helpful. The scissors worked, but wire strippers would have given the girls experience using a tool meant for that specific purpose.
We didn't anticipate that we'd have a shortage of alligator clips.
Monday, March 23, 2015
My First Instructable: How to Make a Light-Up Book with LEDs and a Switch
My First Instructable
.png)
 This is my first Instructable, titled How to Make a Light-Up Book with LEDs and a Switch, a lesson that combines circuitry and notebook hacking/ bookbinding!
The process of creating this was straight-forward and fun. I was even able to upload a YouTube video that I created, to explain how switches work.
I love the idea of having students create their own Instructables, because it places emphasis on creation over consumption.
Subscribe to:
Posts (Atom)