Sunday, June 26, 2016

Flora Sparkle Skirt #etextile

After learning how to make digital clothing for my avatar in Jokaydia Grid (for a graduate class), I decided to return to the real world to try my hand at sewing a real skirt.


Taking inspiration from a variety of YouTube videos (most notably this one), I purchased 20 yards of black tulle (I only used six) and two yards of blue satin (I only needed one) to sew my first garment ever!

My first skirt...sans electronics.

While it turned out pretty well (albeit a little on the large side), it wasn't complete without some bling!  So, I followed Becky Stern's directions for creating a Sparkle Skirt, using a Flora, motion sensor, and 12 neopixels!

Strand test mode


I'm sure there is a better way to do this.

Throughout this process, I learned quite a bit.  In addition to figuring out how to make gathers in fabric using the cording foot on my sewing machine, I discovered the beauty of fabric paint as an electrical insulator, which I'd never thought about prior to this experiment.


Since my skirt has so many gathers, it was prone to short-circuiting before I applied a shiny, navy fabric paint to the exposed conductive thread.   This was the most tedious part of the process, since my circuit went all the way around a rather lengthy diameter. But, it worked like a charm!

On the underside of the skirt, I used iron-on fusible webbing to insulate the data line of the circuit, since it was hand-sewn.


Sunday, June 19, 2016

Bryan Cera's Paper Synth

After finding a link to Bryan Cera's Paper Electronics Workshop on the Google + 21st Century Notebooking community page, I ordered a few supplies and got started making my own paper synthesizer!

Bryan Cera's Paper Synth


I made a few mistakes along the way, but I learned how to use my multimeter in continuity mode and how to manually designate a sketchbook location in the Arduino IDE under preferences, neither of which I've ever had to do before.

Bryan's instructions are very detailed, and he generously shares his templates, code, and supply list.  So, if you are interested in using an ATtiny85 to create your own musical instrument, be sure to check out Bryan Cera's Paper Electronics Workshop!


Friday, May 6, 2016

Channeling the 80's: Sound Reactive Flora Skirt


After putting the finishing touches on this sound reactive leather skirt (made for my daughter, who may never actually wear it in public), I found myself thinking back to my high school years, hanging out in the discos of Germany! While I wouldn't dare go out in public wearing something like this today, I am amused to no end, imagining how quickly I would have jumped into this skirt back in the 80's!  Forgive this shameless indulgence.


If you want to make your own sound reactive wearable, or see the process I followed to make this, check out the Sound Reactive Equalizer Skirt on Instructables.

Leather skirt with Flora microcontrollerSound reactive skirt turned offSound reactive skirt Sound reactive skirt turned on


Wednesday, May 4, 2016

A Few Words on Words

photo of Jill and Doug
Photo Courtesy of RETN: 29 Jan 2016
Last night, while reading Bird by Bird, by Anne Lamott, I was struck by something she said about writing being a "desperate endeavor," driven by our deepest needs "to be visible, to be heard...to make sense of our lives, to wake up and grow and belong," to better understand ourselves and connect with others.

In pondering this raw truth, it occurred to me that while I routinely document things I've discovered while playing with tech tools, I don't spend nearly enough time writing about the meat that matters.

One of the triggers that got me thinking about this, was a blog post written by Bonnie Birdsall, referencing the impact of work that I was lucky to have done alongside Doug Dunbebin prior to his untimely passing. Drawing attention to the fact that Doug's legacy lives on through media creation, partly as a result of our collaboration, made me reflect upon the importance of human connection and the intricate web of our interactions and relationships.

I met Doug in July of 2014, while taking Jay Hoffman's powerful course “From Idea to Impact: Harnessing the Power of Video in Your Classroom."  That experience, coupled with my first foray into the Create Make Learn Summer Institute, whet my appetite for digital story-telling and eventually led to my exploration of green screen video production.  After showing Doug some projects I'd been working on, he encouraged me to keep creating and agreed to co-present a workshop at Dynamic Landscapes in 2015.  The workshop was so well-received that we continued our collaboration, and I had the benefit of learning a great deal about myself and the power of words.

When I started working with Doug, I was terrified of presenting to an adult audience.  At one point early on, I made a disparaging comment about something I'd shared while presenting to a small group.  Doug addressed this later, in such a kind and powerful way, that it awakened something in me, fundamentally derailing some old patterns of thinking.  I look back on this conversation with gratitude, and consider the importance of words.

The last time I saw Doug was at the RETN/VCAM producer's party in late January, where I was honored with a Lifelong Learner Award.  Because he'd given me a little advanced warning, I was able to express a few heartfelt words of appreciation to Doug that evening.  I didn't really have much time to fully reflect upon the experience, however, because my father passed away a couple weeks later after a battle with Alzheimer's disease.  My father's loss was followed by Doug's passing three weeks later.

It's taken a while to process these events and begin shaping my thoughts into words, but I think that the heart of the matter is this:  the words we tell others and the words we tell ourselves are powerful.  We cannot underestimate the power of our words to inspire and heal others; but, this can only happen if we share them.

Saturday, April 30, 2016

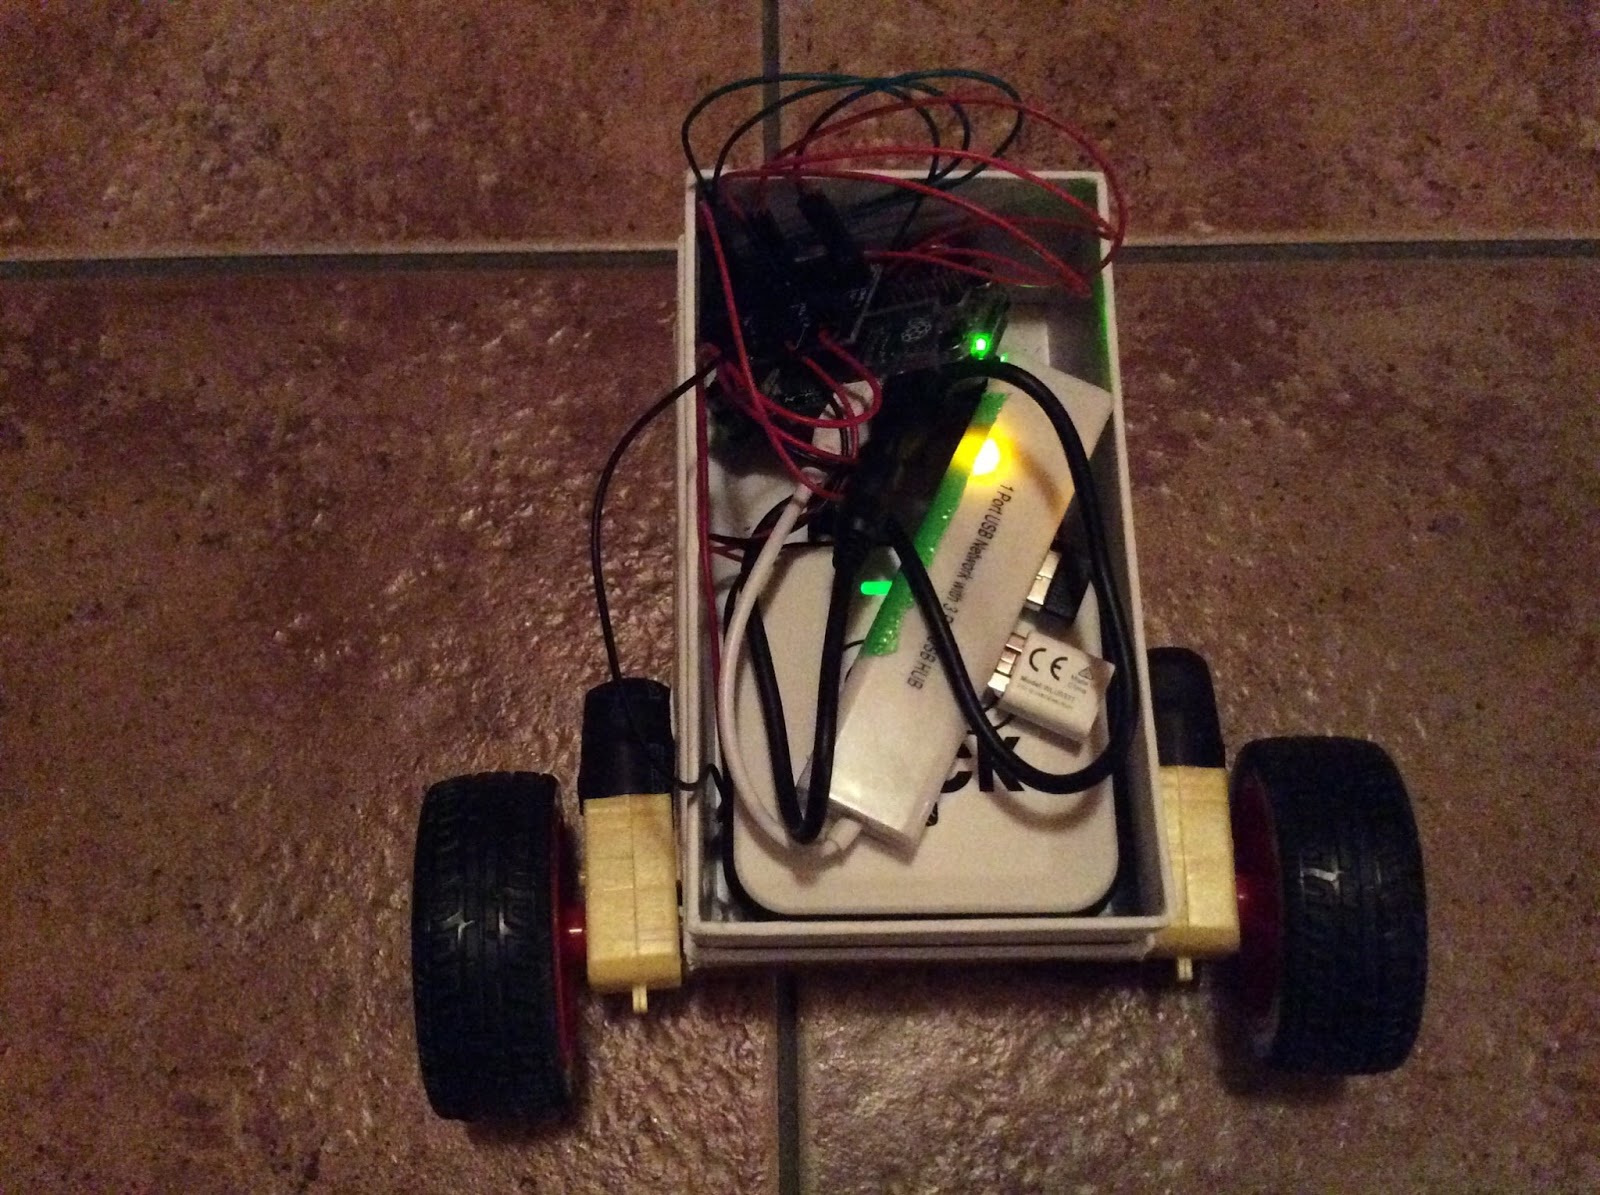
Raspberry Pi Robot

I recently started learning about Raspberry Pi. One thing I'm really excited about is the CamJam EduKit #3 Robotics kit, available through the Pi Hut. In the process of experimenting with this kit, I've started learning basic programming in Python, and I'm starting to understand how the GPIO pins work.  In addition to coming with two motors and some wheels, the kit comes with a line sensor and an ultrasonic sensor to help your robot avoid obstacles. Support worksheets for the kit are pretty easy to follow and encourage experimentation.


Pi Zero Robot


In  one breakthrough, I learned how to talk to my Pi using another computer via Secure Shell (SSH). Now, my Pi doesn't have to be tethered to a monitor, which is useful for building things that move.

While most of the code written for the CamJam EduKit #3 works the same way with a Pi Zero as as a Pi 3, the ultrasonic sensor appears to be an exception.  I don't yet understand why, but I've confirmed this to be the case.


Pi Zero Robot Innards

Thursday, April 28, 2016

Diving Deeper into Raspberry Pi

After a lot of trial and error, my Raspberry Pi 3 and Pi Zero are both up and running on wifi.  The biggest obstacle ended up being that our router was using a WEP key instead of a WAP key. While I don't fully understand how these differ, the router was the root of my difficulty.  I originally attempted to change the pi's configuration with code, but I was unsuccessful.

After changing a setting on the router itself (from WEP to WAP), writing a clean image of Raspian (via NOOBS), followed by running updates (via Ethernet), was enough to work on my Pi3.


I used the following updates:

sudo apt-get update
sudo apt-get upgrade -y
sudo apt-get dist-upgrade -y
sudo rpi-update

Afterwards, I rebooted the Pi, took out the Ethnernet cable, and re-typed my wifi key.

While I wasn't able to directly replicate these results using the Pi Zero on its own, moving the SD card from my Pi3 to the Pi Zero did the trick.

Being new to Raspberry Pi, I'm excited that I've gotten this far.  It's challenging to wade through all of the information available online, because so much of it is outdated or too complex.

At this point, I know enough to be dangerous.

For example, I can use sample code to make a Pimoroni Scroll Phat blink.


Friday, April 22, 2016

E-textile Fun: Sound Reactive Hat

Flora Sound Reactive Hat

I just put the finishing touches on a sound reactive hat that uses a Flora, a tiny microphone, and surface mountable RGB LEDs. This project is an adaptation of Lina Wassong's Sound Reactive Equalizer Skirt, shared on Instructables under a Creative Commons (CC BY NC SA) license. This is a perfect party hat.


Lessons Learned:

1.  I love Adafruit silicone stranded-core wire!
2.  Soldering RBG LEDs is tedious.
3.  A glue gun is a great tool for strengthening solder joints and diffusing light.
4.  Hand held rivet pliers may be harder to work with than standard spot setters.

I used a leather punch and a hand rivet fastener.

The Flora and a microphone are hidden inside the hat.

I went a little crazy with the glue gun!